Thursday, January 5, 2012

#4: Red Velvet (Cup) Cake

This recipe was originally for an 8-inch, 2-layer cake, but I altered the measurements to make 17 cupcakes and I used the same frosting from the chocolate cupcakes. I was worried that by scaling down the ingredients to 2/3 of the original measurements, I would mess it up some how, but they turned out amazing and the party loved them. Red velvet was the birthday girl's favorite. 

Ingredients
  • 1/2 cup unsalted butter, at room temperature
  • 1 1/2 cup sugar
  • 2 eggs
  • 1 1/3 egg yolks
  • 2 1/2 cup cake flour
  • 1 teaspoon baking powder
  • 1 teaspoon baking soda
  • 1 teaspoon kosher salt
  • 1/3 cup dutch processed cocoa powder
  • 1/2 cup nonfat buttermilk
  • 1/2 cup crème fraîche
  • 1/6 cup (8 teaspoons) red food coloring 
  • 1 1/3 teaspoon vanilla extract
Position a rack in the center of the oven and heat the oven to 325 degrees F and place  paper liners in a 12-cup muffin tin. Using a stand mixer fitted with the paddle attachment, or a handheld mixer, cream together the butter and sugar for 2 to 3 minutes (6 to 8 if using the hand mixer) until light and fluffy. In a small bowl, whisk together the eggs and egg yolks until mixed. On low speed, slowly pour the eggs into the butter-sugar mixture and mix to combine for 1 to 2 minutes until the eggs are thoroughly incorporated. 

In a medium bowl, sift together the flour, baking powder, baking soda, salt, and cocoa powder. In a small bowl, whisk together the buttermilk, crème fraîche, food coloring, and vanilla extract until combined. 

On the lowest speed add about one third of the flour mixture to the egg-butter mixture and mix until just combined. Immediately pour in about half of the buttermilk mixture and continue to mix on the lowest speed untill the buttermilk mixture is almost thoroughly incorporated. Stop to scrape the sides and bottom of the bowl well. Again on the lowest speed, add about half of the remaining flour mixture and mix just until barely combined. Add the rest of the buttermilk mixture and combine. Be careful not to over mix. At this point it is best to finish mixing by hand. Fold in the remaining flour until the batter is homogeneous. 

Divide the batter evenly between the cupcake liners. Bake for about 25 minutes or until the cupcakes can be poked in the center with a toothpick and have the toothpick come out clean. Let the cupcakes cool completely on a wire rack before frosting. 

"For the Crispy Magic Frosting:
  • 2/3 cup granulated sugar
  • 2 egg whites
  • 1 1/2 cups unsalted butter, at room temperature, cut into 2-inch chunks
  • 1 2/3 cups confectioners sugar
  • 1/4 teaspoon kosher salt
  • 2 tablespoons milk
  • 1 tablespoon vanilla extract
While the cupcakes are cooling prepare the frosting. In a small heatproof bowl, whisk together the granulated sugar and egg whites to make a thick slurry. Place the bowl over (not touching) simmering water in a saucepan and heat, whisking occasionally, for 3 to 5 minutes, or until the mixture is hot to the touch and has thinned out a bit. Remove the bowl from the heat. Use an electric mixer, and whip on medium-high speed for 6 to 8 minutes until the mixer has become a light, white meringue and is cool to the touch. Turn down the speed to medium and add the butter, a few chunks at a time, and beat for 3 to 4 minutes until the butter is full incorporated. Add the confectioners' sugar, salt, milk, and vanilla and continue to beat on medium speed until the mixture is smooth and satiny. You should have about 3 1/2 cups of frosting. Use it immediately or store in an airtight container in the refrigerator for up to 2 weeks. When frosting the cupcakes, make sure they're completely cooled, or the frosting will melt on the cakes and make a mess. You can spread the frosting right on them, or fit a pastry bag with a small round or star tip and fill the bag, then pipe the frosting onto the cupcakes. "


#3: Chocolate Cupcakes with Crispy Magic Frosting

I got to use my new Christmas presents for this recipe! So for Christmas, my parents gave me a new electric handheld mixer, a 30-piece cake decorating kit, and a two tiered cupcake caddy that carries 24 cupcakes. I was super excited about the mixer, because finally I could make fluffy creamy meringue/frosting. I just had to put it to use for the surprise 21st birthday/NYE party we had for my friend, and the caddy worked perfectly for me to bring the cupcakes to New York. I didn't take too many pictures during the process of this one because my hands got too chocolatey to handle the camera. 


Ingredients
  • 2 ounces unsweetened chocolate, chopped
  • 1/4 cup Dutch processed cocoa powder
  • 1 cup granulated sugar
  • 1/2 cup unsalted butter
  • 1/3 cup water
  • 1/2 cup milk
  • 1 egg
  • 1 egg yolk
  • 1/2 teaspoon vanilla extract
  • 1 cup unbleached all-purpose flour
  • 1 teaspoon baking powder
  • 1/2 teaspoon baking soda
  • 1/2 teaspoon kosher salt
For the Crispy Magic Frosting:
  • 2/3 cup granulated sugar
  • 2 egg whites
  • 1 1/2 cups unsalted butter, at room temperature, cut into 2-inch chunks
  • 1 2/3 cups confectioners sugar
  • 1/4 teaspoon kosher salt
  • 2 tablespoons milk
  • 1 tablespoon vanilla extract
Makes 12 cupcakes

Start by positioning a rack in the center of the oven and preheat the oven to 350 degrees F and place paper liners in a 12-cup muffin tin. In a small heatproof bowl, combine the chocolate and cocoa powder. Then in a small saucepan, heat the granulated sugar, butter, and water over medium-high heat, whisking occasionally, for 3 to 4 minutes, until the butter is melted and the sugar is dissolved. Pour the hot butter-sugar mixture over the chocolate-cocoa mixture and whisk until the chocolate is completely melted and the mixture is homogeneous. Whisk the milk, egg, egg yolk, and vanilla into the chocolate mixture until thoroughly combined. 


In a separate bowl, stir together the flour, baking powder, baking soda, and salt until well mixed. Dump the flour mixture on top of the chocolate mixture. whisk until the dry ingredients are totally mixed into the chocolate mixture. Whisk until the dry ingredients are totally mixed into the chocolate mixture. Let the batter sit for at least 1 hour at room temperature to allow the liquid to be totally absorbed into the batter, so the batter thickens up a bit and isn't too soupy, or transfer to an airtight container and store in the fridge for up to 3 days. When ready to bake, spoon the batter into the prepared muffin cups, dividing it evenly and filling the cups to the rim. Bake for about 30 minutes, or until the tops spring back when pressed with a fingertip (I start checking the cupcakes after 20 minutes because my oven bakes unusually fast). Let cool completely in the pan on a wire rack.

While the cupcakes are cooling prepare the frosting. In a small heatproof bowl, whisk together the granulated sugar and egg whites to make a thick slurry. Place the bowl over (not touching) simmering water in a saucepan and heat, whisking occasionally, for 3 to 5 minutes, or until the mixture is hot to the touch and has thinned out a bit. Remove the bowl from the heat. Use an electric mixer, and whip on medium-high speed for 6 to 8 minutes until the mixer has become a light, white meringue and is cool to the touch. Turn down the speed to medium and add the butter, a few chunks at a time, and beat for 3 to 4 minutes until the butter is full incorporated. Add the confectioners' sugar, salt, milk, and vanilla and continue to beat on medium speed until the mixture is smooth and satiny. You should have about 3 1/2 cups of frosting. Use it immediately or store in an airtight container in the refrigerator for up to 2 weeks. When frosting the cupcakes, make sure they're completely cooled, or the frosting will melt on the cakes and make a mess. You can spread the frosting right on them, or fit a pastry bag with a small round or star tip and fill the bag, then pipe the frosting onto the cupcakes. 

This was my first time ever using a pastry bag, so I didn't do an excellent job on mine, but I can guarantee it tasted fantastic nonetheless. 


Wednesday, January 4, 2012

#2: Milk Chocolate Hazelnut Cookies

These cookies are absolutely fantastic and I didn't even make them perfectly. As I mentioned in the last post (I apologize for the huge delay), I forgot to toast the nuts. When  you make these cookies, TOAST THE NUTS! They were amazing with untoasted nuts, but they'd be absolutely heavenly done correctly. I shared these cookies with friends and family and everyone loved them. In the end I was sad that I'd shared so many, because I didn't leave enough for myself. 


Ingredients
  • 3/4 cup plus 1 tablespoon unsalted butter at room temperature
  • 2/3 cup granulated sugar
  • 2/3 cup packed light brown sugar
  • 2 eggs
  • 1/2 teaspoon vanilla extract
  • 1 1/2 cups blanched whole hazelnuts, toasted
  • 1 1/2 cups unbleached all-purpose flour
  • 1 teaspoon baking soda
  • 3/4 teaspoon kosher salt 
  • 12 ounces milk chocolate, chopped into 1/2 inch pieces
Cream together the butter, granulated sugar, and brown sugar until the mixture is light and fluffy. This is best done using an electric mixer but it can be done manually with a wooden spoon (I hadn't received my electric mixer for Christmas yet when I made these) and should take about 10 minutes. Occasionally scrape the sides and bottom of the bowl to release any clinging butter or sugar. Next, beat in the eggs and vanilla for 2 to 3 minutes until thoroughly combined. Scrape the bowl again. 

Using a food processor, pulse 1/2 cup of the hazelnuts until ground into a fine powder. Then roughly chop the remaining 1 cup hazelnuts and combine. 


In a medium bowl, stir the ground and chopped hazelnuts, the flour, baking soda, salt, and chocolate (instead of chopping chocolate I just used a bag of milk chocolate chips).  Slowly blend this flour mixture into the butter-sugar mixture and then mix until the flour mixture is totally incorporated and the dough is evenly mixed


For the best results, scrape the dough into an airtight container and let it rest in the refrigerator overnight (or at least for 3 to 4 hours) before baking. When you're ready to bake, position a rack in the center of the oven and heat the oven to 350 degrees. Drop the dough in 1/4-cup balls onto a baking sheet, spacing them about 2 inches apart. Flatten each ball slightly with the palm of your hand. Bake for 20 to 22 minutes, or until the cookies are golden brown on the edges and pale and slightly soft in the center. Let cool on the baking sheet on a wire rack for 5 to 10 minutes, the transfer the cookies to the rack to cool completely. 


The cookies can be stored in an airtight container at room temperature for up to 3 days. The unbaked dough can be stored in an airtight container in the refrigerator for up to one week.


Wednesday, December 28, 2011

Joanne Chang's Baking Tip No. 7: Toast your nuts

Toasting nuts too little or not at all is a fairly common and easy-to-fix baking mistake. When I go out to a restaurant or bakery and try a new pastry or dessert, I can taste whether the nuts are properly toasted. When they are, I know someone who is paying attention is in the kitchen making pastries that I want to eat. Untoasted nuts are labeled "raw" and that is exactly how they taste. Taking the time to toast nuts to a proper light golden brown color brings out their natural oils and heightens their nutty flavor. It is easy to do, too: Spread the nuts on a rimmed baking sheet and place in a preheated 350-degree-F oven for 8 to 10 minutes, or until they are fragrant and have taken on a golden brown color. To make sure they are ready, bite into a nut. For almonds and hazelnuts (which tend to require longer toasting), the interior should be medium brown. For walnuts and pecans (which toast more quickly), the interior should be light brown. In general, the firmer the nut, the longer it should be toasted to bring out its full flavor.
So I prepared the dough for some tasty milk chocolate hazelnut cookies tonight. But in preparing my ingredients I skipped over a step that Chang stresses in the beginning of the book, toasting your nuts. I'm sure the cookies will still be good, but I'm disappointed in myself. I'm not off to a great start with these recipes. With the scones I accidentally put in less flour than was called for and left them in the oven a bit long so they were dry. I didn't bake the cookies tonight though. I left the dough to sit in the refrigerator overnight, so I'll let Phoebe and Genna be the judges of how they taste tomorrow. 

In other news, the electric hand mixer and cake decorating kit that I ordered before Christmas should arrive on my doorstep tomorrow. I'm so excited! Decorate all the cakes! The first recipes I have planned for this are some cupcakes that I intend to bring to a New Years Eve party on Saturday. Flour has a yummy sounding chocolate cupcake with icing recipe which I'll be using. There's also a recipe for a red velvet layer cake which I'll alter to make cupcakes. I tweeted Chang asking how I should change it and responded saying to decrease the temperature of the oven by 25 degrees and halving the time. The cupcakes won't be done in half the time, but I should start poking them with toothpicks around then to test. If I have the time and the courage I might try my hand at making my own icing to complement the red velvet cupcakes. 

Tuesday, December 27, 2011

#1: Oatmeal Raisin Scones


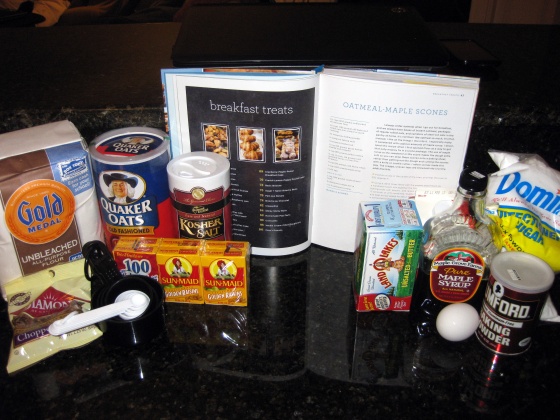
Sorry it took me so long to finally do this. I eventually managed to drag myself to the grocery store and buy everything I needed, plus some stuff for other recipes. So here’s my first attempt at baking from Flour with the first recipe in the book: oatmeal maple scones. Normally I bake sweeter treats meant for dessert, but since the book starts with breakfast pastries I thought I’d start there and make something yummy for my family to eat in the morning.
The recipe called for:
  • 1 1/2 cups unbleached all-purpose flour
  • 1 1/4 cups old fashioned rolled oats
  • 1 1/2 teaspoons baking powder
  • 1/4 teaspoon baking soda
  • 1/4 teaspoon kosher salt
  • 1/2 cup pecan halves toasted and chopped
  • 1/2 cup golden raisins
  • 1/2 cup cold unsalted butter, cut into 8 to 10 pieces
  • 1/3 cup cold heavy cream
  • 1/2 cup maple syrup
  • 1 cold egg
And for the glaze:
  • 1 cup confectioners sugar
  • 2 tablespoons maple syrup
  • 1 to 2 tablespoons water
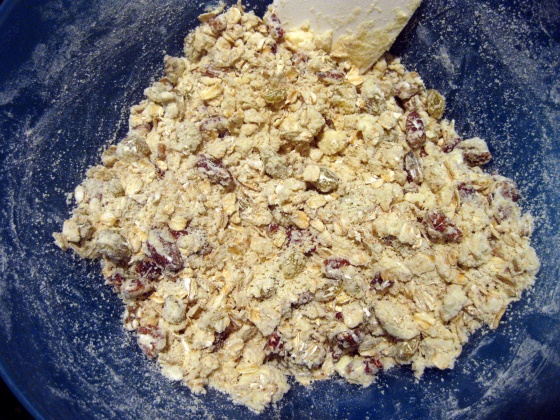
I started out by combining the dry ingredients and stirring thoroughly. Then adding the chunks of butter and stirring those until they mostly combined with some grape sized chunks still visible.
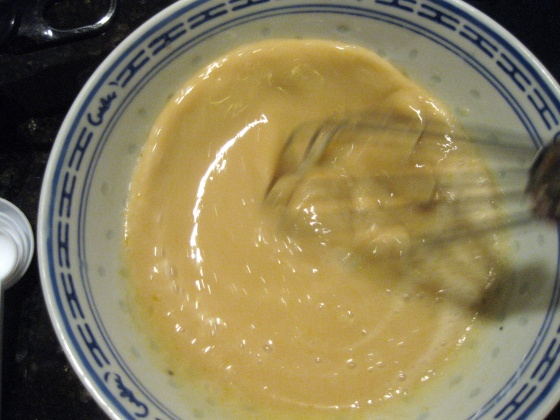
After all the dry ingredients were well combined, I then whisked together the heavy cream, maple syrup, and egg in a separate bowl.
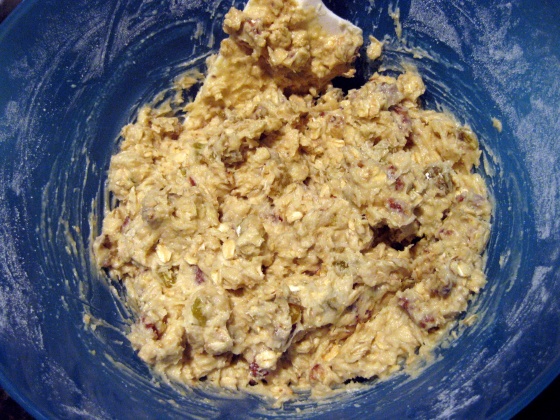
Finally I poured the wet mixture into the dry mixture and mixed thoroughly for about a minute until the dough came together, although it was still wet.
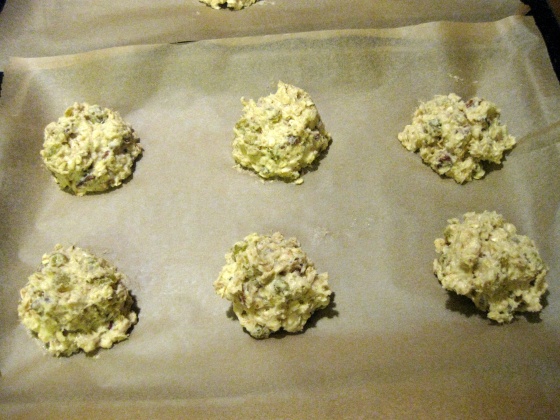
Next scoop the dough onto a baking sheet lined with parchment paper. I made my scoops about 1/3 of a cup and spaced them 2 inches apart. You should be able to make 8 to 10 scones.
Bake in the middle rack at 350 degrees for about 30-40 minutes until the tops are golden brown. When out of the oven, allow them to cool for about 30 minutes on a wire rack. While they cool make the glaze by whisking together the confectioners sugar, maple syrup, and water then brush the glaze onto the scones generously.
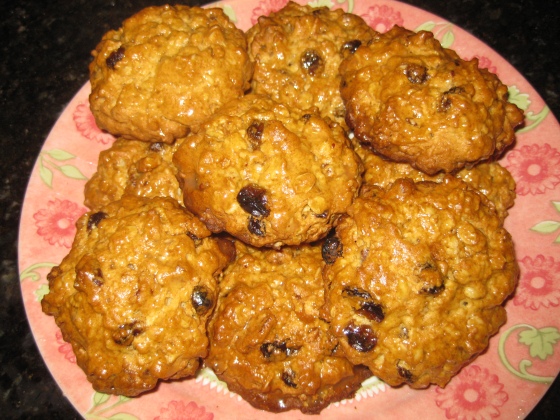
Here’s a look at my finished product. They’re not perfect. The bottoms were a bit burnt so the scones were dry, but they taste good. I especially love the flavor from the golden raisins. The pecans could have been chopped finer though since I didn’t chop them much more since the bag I bought already came chopped.
Later this week I’ll be baking milk chocolate hazelnut cookies.

Friday, December 16, 2011

The Start of a New Project

Let me introduce myself. My names Lisa. I'm in my third year of undergraduate studies at Carnegie Mellon University majoring in applied mathematics. I grew up just outside of Boston in Newton, MA. I've always been a food fanatic and in recent years I picked up baking as a hobby. Living in such a culturally diverse city allowed me to try all kinds of foods, and especially desserts. From cannolis to churros to mochi ice cream. I've gotten the chance to try it all, things that I wouldn't normally get to eat in my traditional Chinese household. I was never allowed to bake much at home, because my parents kept a fairly healthy lifestyle and diet which sugary snacks did not fit into. At school my baking is rather conservative, kept to brownies, cookies, and cakes, etc. Things that didn't require too many ingredients that would put a dent in my wallet. So I’m hoping this project will help me branch out a bit. Now let me tell you how this project came to be.

The other night I went to the Unhappy Hipsters book signing with my friend, Cassie. It was held at a small studio store in the Fort Point district of Boston called Twelve Chairs. The place mostly sold furniture and decorative pieces for the high income hipster community. They also had several other signed books on display. I guess it's a common occurrence for this place to hold book signings. A specific book caught my eye: Flour by Joanne Chang, a baking recipes cook book. I picked it up because I liked the cover design and I have an affinity for cook books. I skimmed through some of the recipes and came to the conclusion that it was a very well designed cook book, so I decided to buy it. The woman at the cash register looked at the book and asked me if I'd ever been to any of the author's bakeries in Boston. I told her that I hadn't and that I just really enjoy baking. She told me that I had to check out Flour bakery (apparently there are three locations around the city) and asked if I was from the area. I told her that I did indeed live in the area for now, but that I'm studying math at Carnegie Mellon. She suddenly had a look of surprise on her face and told me that this was so perfect for me because as it turns out, the author of the cook book, Chang, also studied math before she started baking and to top things off she's also Chinese. Crazy right? So I bought the book and came home and immediately googled her. Basically this woman has my ideal future. She received her PhD in applied mathematics from Harvard University and she worked for a couple years in management before she decided to work at a bakery in Newton assisting their head baker. Newton! I'm from Newton! She then moved to New York for a couple years and when she returned to Boston she opened up her own bakery, Flour, and a Chinese fusion restaurant with her husband called Meyers + Chang.

So basically I'm totally crazy about this woman now. And my plan is to bake through her entire book, Julie & Julia style, while blogging about it. I'm definitely going to visit her bakery and restaurant in the South End this weekend and I'll make sure to write a post on that. Reading about her has just been such an inspiration to me. Chinese applied mathematician baker from Boston. It's just too perfect for words.